


Orange Butter Lip Balm
This has been one of our most popular promotional lip balms! We are often asked if we brought this lip balm to events, conferences and even business meetings.
This...
I am excited to mix up a batch of soap using Hibiscus Passion Fragrance Oil. The scent is lightly fruity, a bit floral, and has a lovely undertone of musk that gives it surprising depth. It’s intriguing, and I’m looking forward to seeing how it works out in soap.

Finished bars of Hibiscus Passion soap.
I’ll be using colors you’d see in hibiscus flowers: yellow, white, deep pink, and green. I pondered several designs before settling on a tiger stripe. I think the striped layers of different colors will be pretty.
Because Hibiscus Passion Fragrance Oil lightly discolors, I may add Titanium Dioxide to the pink and yellow colors. I think it will be beautiful with the green, and I’ll see how dark the discoloration makes the batter before deciding how much TD will be needed. I’m also adding a little white Kaolin Clay (1 tablespoon per pound of oils), both to offset discoloration and to add nice slip and glide to the soap.
The other consideration is acceleration; in testing, Hibiscus Passion moderately accelerated trace. Knowing that I will use a recipe that tends to stay fluid.
Gather some supplies and equipment, and make this soap with me.
SUPPLIES:Soybean Oil |
EQUIPMENT:Scale |
Recipe for 22 ounces8.25 ounces Soybean Oil |
Percentages37.5% Soybean Oil |
Before getting started, please prepare to soap safely! Long sleeves, gloves, eye protection, and close-toed shoes are a must. If you have never made cold process soap before, we’re glad you’re here! Please check out this blog post, which is the first in a series on beginning soapmaking.
Weigh all the oils into a microwave-safe container; set aside.
Weigh the fragrance oil into a small glass container; set aside.
Weigh the lye.
Weigh the water.
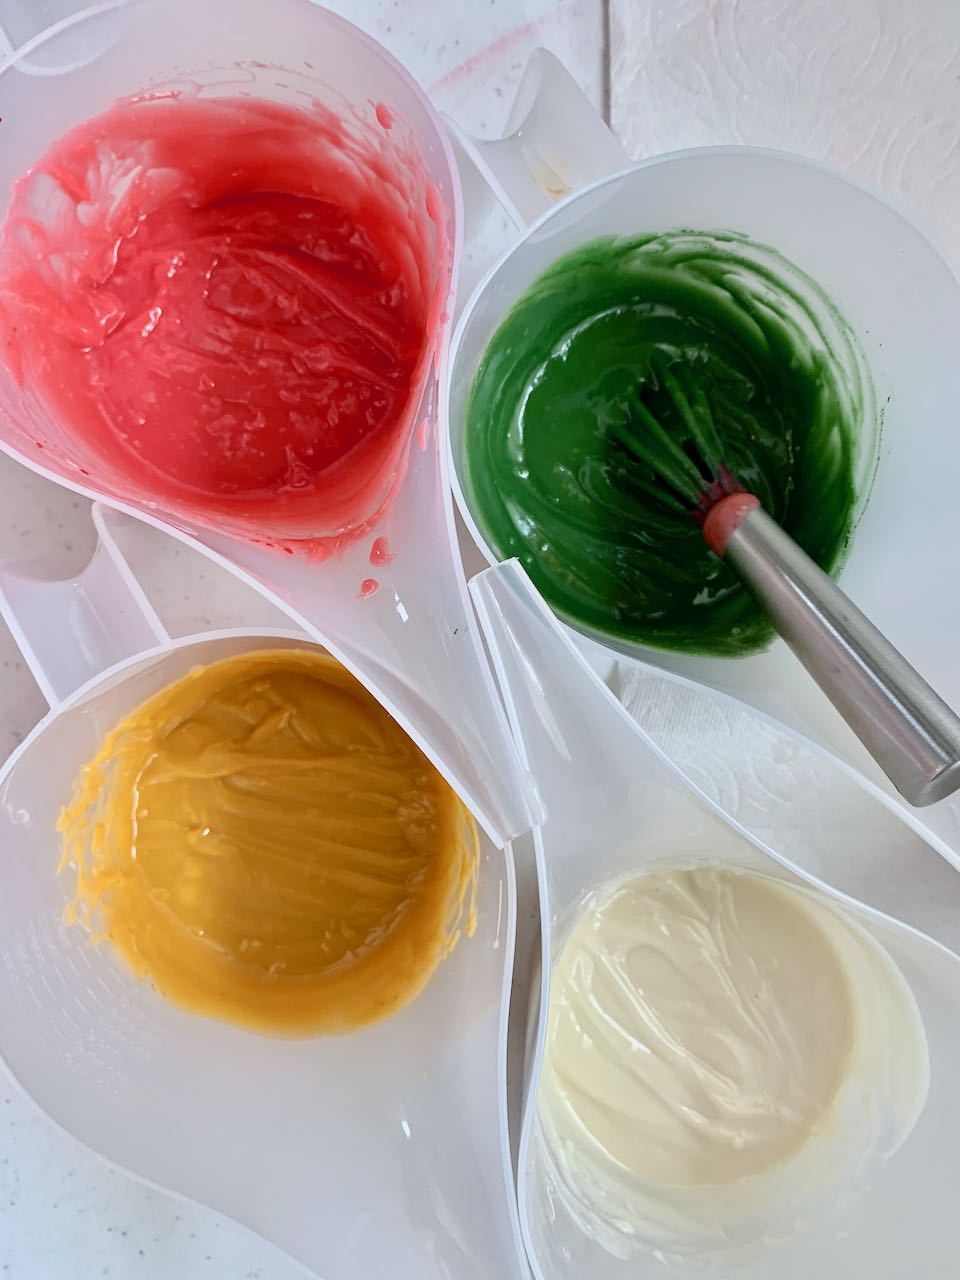
Put about 1/2 ounce of Liquid Glycerin in each of four paper cups, adding 2-4 scoops of colorant to each paper cup and mixing well with a mini stick blender to disperse the colorant in the glycerin. Make sure to set them well out of the way of your work area, so you don’t spill them.
 These are the colorants and fragrance oil I’ll be using today. |
 Each paper cup has a colorant dispersed in liquid glycerin. From top left: Titanium Dioxide, Yellow Oxide, Amethyst Pink Color, and Moss Green Color. |
Slowly add lye to water, stirring. Do this in a well-ventilated area. It will give off toxic fumes that you do not want to inhale. Once the lye is completely dissolved, set the mixture aside to cool.
Pop the oils into the microwave to melt, using 30-second increments. Once they are completely liquid, add 1.5 tablespoons of Kaolin Clay and mix well with a stick blender. Set this mixture aside to cool.
 Adding 1.5 tablespoons of Kaolin Clay to the melted oils. |
 Adding Hibiscus Passion Fragrance Oil to the soap batter. |
Here is your break to clean up your workspace, set out the mold you will use, visit the rest room, feed a bottle to your hungry baby goat. (You don’t have a hungry baby goat? I’ll loan you one!) Once the oils and the lye mixture are within 10 degrees of each other and have cooled to about 110-130 degrees F, you’re ready to make soap. When I checked the temperature of the oil mixture and lye mixtures after giving them some cooling time, they were coincidentally both 113 degrees F.
Carefully pour the lye mixture into the oils, taking care not to splash. Stir with your soap spoon, then pulse the stick blender several times to emulsify the soap batter. Make sure to burp the air bubbles out of the stick blender’s bell to avoid adding air to your soap batter! Do this by tapping the stick blender on the bottom of the soap bucket a few times before blending. Because I was expecting the Hibiscus Passion Fragrance Oil to cause moderate acceleration, I stick blended only enough to emulsify the soap batter, leaving it quite fluid. Then I hand-stirred the fragrance oil into the batter. I was quite surprised to see that the batter went from very fluid to soft-set pudding consistency immediately.
 Soap batter after dividing and coloring. |
 You can see how thick the soap batter was, but I am hopeful the stripes will still look good. |
I went ahead and poured it into the four waiting measuring cups to color, grabbed a small whisk, and started adding the premixed colorants to each. The batter was still fluid enough to whisk in each colorant, but pouring was not going to be possible. At this point, I nearly abandoned the zebra stripe plan. I scooped and scraped all the white soap batter into the mold, banging it on the table to level it and knock out any air bubbles that might be in it. But when I saw that the soap batter did actually become level, I decided to use the green, pink, and yellow soaps to make the stripe pattern. I used my flexible scraper to scoop and spread a line of soap batter in each color down the center of the mold, banging it to level the soap batter after every two or three additions.

Hibiscus Passion Tiger Stripe
The soap batter’s consistency had not changed much from the time I’d begun the design, which was very much a relief. I put the lid on the mold and wrapped it in a towel to insulate. This will help the soap to fully gel so the colors will pop instead of having a matte appearance.
After about 16 hours, I unmolded the soap. The stripes came out better than I’d thought they would, given the thickness of my soap batter. The white bottom layer looks neat, but I think I’d like it better if the white were part of the stripes. I’m not sure, though. That’s the challenging part of doing a design in the soap – I always wonder how it would have looked if I had done it a bit differently.
The colors are pretty much what I’d expected, and I am glad the soap gelled fully. If I remade this, I’d dial back the yellow colorant a bit. It’s more of a mustard, and I was aiming for something different. Yellow Oxide definitely tends toward a muddier hue.
The Hibiscus Passion Fragrance is not overpowering, wafting around me pleasantly as I worked with the freshly-cut soap. When wet, this should be a lovely scent to enjoy in the shower.

This...


